Do you want to give your home a new look without breaking the bank? Painting is a great way to transform your space, and the best part is you can do it yourself!
With a little bit of planning, the right tools, and some professional tips and tricks, you can achieve a flawless finish that will make you proud.
In this article, we will guide you through the process of DIY painting, from choosing the right paint and tools, to preparing your surfaces, and tackling common painting problems.
We will also share some painting techniques that will help you achieve a professional finish and add some finishing touches for a polished look.
Whether you’re a seasoned DIYer or a beginner, you’ll find everything you need to know to transform your home with a fresh coat of paint.
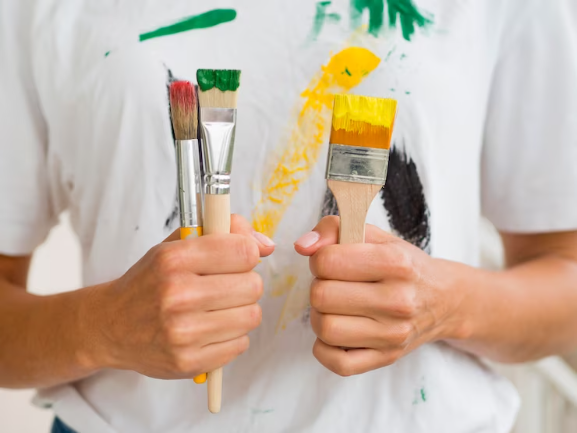
Choosing the Right Paint and Tools
When it comes to renovating, it’s crucial to ensure that you’re equipped with the appropriate paint and tools.
The first step in choosing the right paint is to consider the color psychology. Different colors evoke different emotions and moods, so it’s important to choose a color that aligns with the vibe you want to create in your home. For example, blue is a calming color, while yellow is energizing.
Neutral colors like gray or beige are great for a calming and sophisticated look, while bold colors like red or orange can add a pop of excitement to a room.
Another important factor to consider when choosing paint is the eco-friendliness of the options available. Many paint brands now offer environmentally friendly options, such as low VOC (volatile organic compounds) or zero VOC paints. These options are safer for the environment and for your health, as they emit fewer harmful chemicals. Plus, they’re just as effective as traditional paint options, so you don’t have to sacrifice quality for sustainability.
When selecting your tools, be sure to invest in a good quality paintbrush and roller to ensure a smooth and even application.
Preparing Your Surfaces for Painting
To ensure your painted surface looks flawless, start by scrubbing it clean with soap and water, then sand it down until it’s smooth to the touch. Sanding is important, especially if you’re painting over a glossy or previously painted surface. It creates a rough texture for the new paint to adhere to, ensuring longevity and preventing peeling or cracking.
However, if you’re painting over a brand-new drywall or plaster surface, priming is recommended instead of sanding. Priming will help the paint adhere better and cover any imperfections or inconsistencies in the surface.
Covering imperfections is another important step in preparing your surfaces for painting. Once you’ve cleaned and sanded/primed your surface, inspect it closely for any cracks, holes, or other imperfections. Use spackle or joint compound to fill in these areas, then sand them down until they’re flush with the surface. This will ensure a smooth and even surface for painting.
Don’t forget to also remove any hardware or fixtures that may be in the way, and use painter’s tape to mask off areas that you don’t want to be painted, such as trim or windows. By following these steps, you’ll have a perfectly prepped surface for painting, ensuring a professional-looking finish.
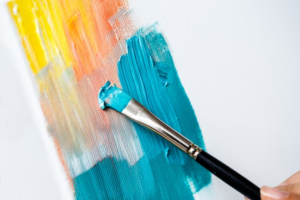
Painting Techniques for a Professional Finish
Achieving a polished and refined look for your painted surface involves utilizing professional painting techniques that will elevate the overall appearance of your project.
One of the most important techniques to master is blending colors. This involves mixing two or more colors together to create a seamless transition between them. To achieve this, start by painting the lighter color first and then gradually add the darker color until you reach the desired shade. Use a clean brush to blend the colors together, working in small sections at a time. This will create a smooth and natural-looking gradient that will add depth and dimension to your painted surface.
Another technique that can add interest and texture to your painted surface is textured painting techniques. This involves using tools such as sponges, brushes, or even crumpled paper to create a unique texture on your surface. For example, you can use a sponge to create a stippled effect, or a brush to create a crosshatch pattern. Experiment with different tools and techniques to find the one that works best for your project.
Just be sure to practice on a small area first to ensure that you achieve the desired effect before applying it to the entire surface. With these techniques, you can achieve a professional-looking finish that will transform your home.
Tackling Common Painting Problems
If you’re tired of dealing with pesky painting problems that ruin your hard work, it’s time to learn how to tackle them like a pro.
To avoid streaks when painting, make sure to apply paint in a consistent manner, using the same amount of pressure and speed for each stroke. Avoid overloading your brush or roller with paint, as this can create uneven coverage and streaks. Instead, use light, even pressure and apply multiple thin coats for a smooth, even finish.
Fixing drips can be a bit trickier, but it’s important to catch them early before they dry. Use a small brush to carefully remove excess paint and smooth out the area. If the drip has already dried, gently sand it down with a fine grit sandpaper and touch up the area with a small brush.
When dealing with bleeding, choose a high-quality primer specifically designed to block stains and tannins. This will prevent any discoloration from showing through your paint job and ensure a professional finish.
Adding Finishing Touches for a Polished Look
Now that you’ve tackled those pesky painting problems, it’s time to add those finishing touches for a polished look that’ll make you proud of your hard work.
One easy way to add visual interest and depth to a room is by creating an accent wall. This can be achieved by painting one wall a different color or even using wallpaper or textured finish. The key is to choose a wall that’ll draw the eye and complement the rest of the room’s decor.
Another fun and creative way to add a finishing touch to your painted walls is by using decorative stenciling. This technique involves using a stencil to create a repeated pattern or design on a wall, adding texture and dimension. Stenciling can be done with paint or even a metallic finish for a glamorous touch.
You can create a bold design with bright colors or keep it subtle with a tone-on-tone effect. Whatever your style, adding stenciling to your walls is an easy DIY project that’ll add a unique touch to your home.
Here is Ultimate Guide to Home Maintenance.
Frequently Asked Questions
How long should you wait before painting over wallpaper?
So, you’re wondering how long you should wait before painting over that outdated wallpaper that’s been staring back at you for years.
Well, if you’re a fan of surprises, go ahead and slap that paint right on top of the wallpaper.
Who knows what kind of texture and bumps you’ll end up with?
But if you’re not a fan of surprises and want a smooth finish, it’s best to remove the wallpaper first.
This involves preparing your walls by turning off your phone, locking all doors, and spending hours scraping and peeling until your fingers fall off.
Okay, it’s not that dramatic, but it does require some elbow grease.
Once the wallpaper is removed and the walls are prepped, you can finally apply that fresh coat of paint without any surprises.
Trust us, it’ll be worth the wait.
Can you paint over glossy surfaces without sanding them first?
If you’re wondering whether you can paint over glossy surfaces without sanding them first, the answer is yes!
There are glossy surface alternatives that you can use to make the paint stick.
One option is to use a deglosser, which is a liquid that you apply to the surface to remove the gloss.
Another option is to use a bonding primer, which is specifically designed to adhere to glossy surfaces.
Additionally, you can try painting with unconventional tools, such as a foam roller or a paint sprayer, to achieve a smoother, more even finish.
So, don’t let a glossy surface stop you from transforming your home with a fresh coat of paint – give these alternatives a try and see the difference it can make!
How do you know if you need to use a primer before painting?
Before you start painting, it’s important to determine whether or not you need to use a primer.
Picture this: you’ve spent hours prepping your walls for a fresh coat of paint, only to find that the paint won’t stick properly, or the color isn’t uniform. This is where using a primer can make all the difference.
Primer is designed to provide a smooth, even surface for paint to adhere to, while also helping to hide stains and imperfections. Additionally, using a primer can save you money in the long run by reducing the amount of paint needed to cover a surface.
It’s important to note that not all surfaces require a primer, so be sure to check for surface compatibility before applying.
What is the best way to clean painted walls without damaging the paint?
To keep your painted walls looking fresh and vibrant, it’s important to know the best cleaning techniques and maintenance tips.
First and foremost, avoid using harsh chemicals or abrasive cleaning tools that can damage the paint. Instead, opt for a gentle solution of warm water and mild soap, applied with a soft cloth or sponge.
For tougher stains or marks, try using a Mr. Clean Magic Eraser or a baking soda paste.
It’s also a good idea to periodically dust your walls with a microfiber cloth or vacuum attachment to prevent dirt and grime buildup.
By following these simple cleaning and maintenance tips, you can ensure your painted walls stay beautiful for years to come.
Is it necessary to use a sealer after painting a surface?
You’ve put in the effort to paint your walls and now you’re wondering if it’s necessary to use a sealer.
The answer is yes, using a sealer can provide numerous benefits to your painted surface. It not only helps to protect the paint from fading or chipping, but it also makes it easier to clean and maintain.
However, it’s important to choose the right sealer for your specific surface. Consider the type of paint you used, the surface you painted, and the level of protection you desire.
With the right sealer, you can ensure that your painted surface stays looking fresh and new for years to come.
Conclusion
Congratulations! You’ve successfully transformed your home with these DIY painting tips and tricks.
By choosing the right paint and tools, preparing your surfaces properly, using proper painting techniques, and addressing common problems, you’ve achieved a professional-looking finish.
Did you know that a fresh coat of paint can increase the value of your home by up to 10%? This just goes to show how important it is to invest in quality materials and take your time with the painting process.
Not only will it make your home look beautiful, but it can also pay off in the long run. So, keep these tips in mind for your next home improvement project, and enjoy the transformation!